
In this article, you’ll learn how to build a RESTful API Server in Node.js using Feathers.
An API server, also known as an Application Server, is a program that provides data to front-end applications. It also handles business logic in the back end and provides restricted access to an organization's database. It doesn't just prevent unauthorized persons from accessing the data; it can also restrict logged-in users from accessing or altering data if they don't have permission to do so.
Every application you build will need to provide a service to its end users. For that, your application will need data to process. You can use remote APIs to create a new service. For most applications, though, you’ll need to manage your own data store. A popular option is to use online data storage services such as Firebase. This way, you don't have to deal with the nitty gritty details of running a distributed database server. However, your project needs may require the use of a full-fledged, in-house database management system such as MongoDB or Oracle. For your front-end application to access the data stored in the database, you’ll need a server application that sits between the database and the front-end application.
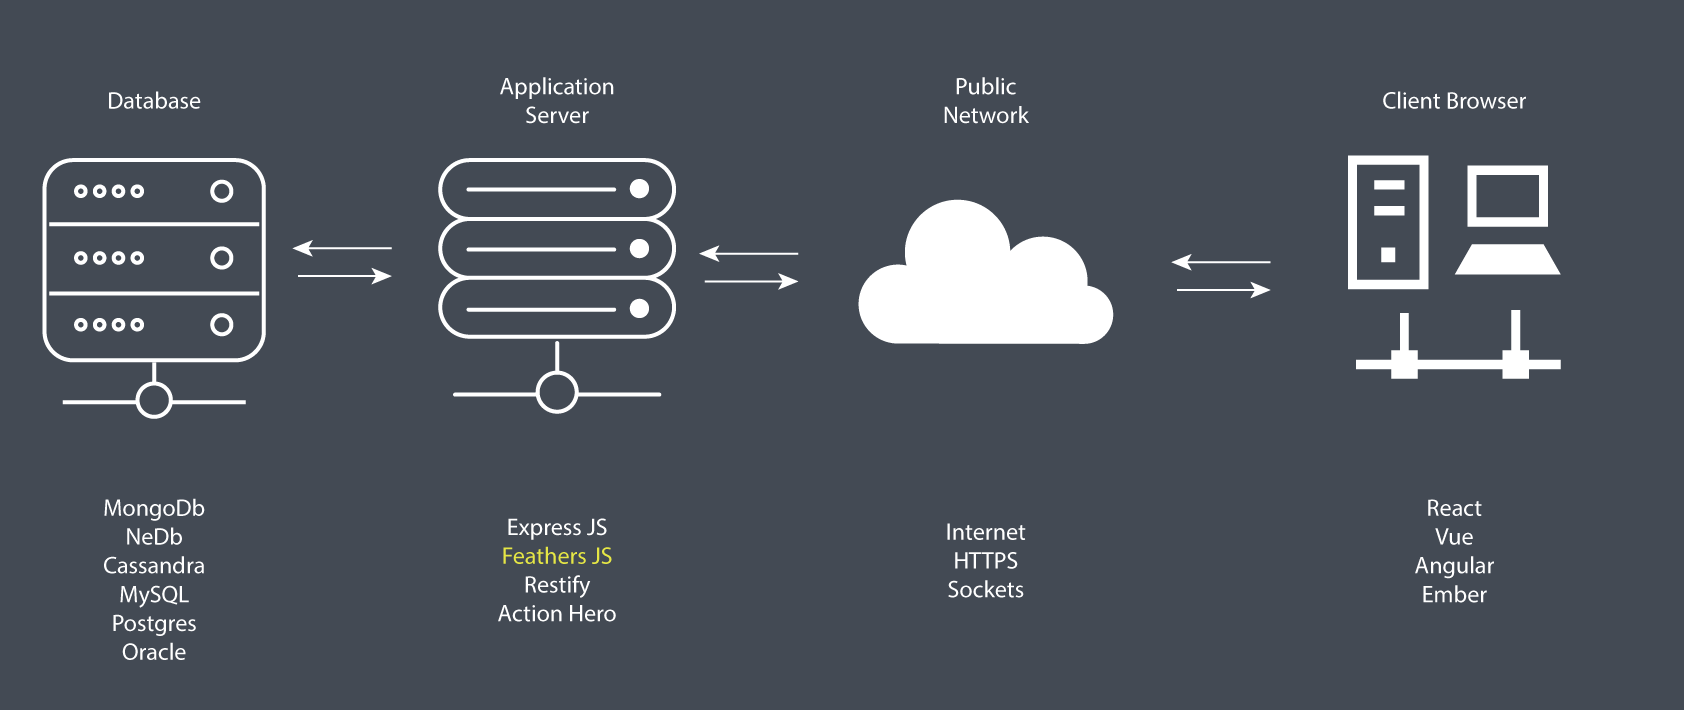
As illustrated in the diagram above, the work of an application server is to access data from a database using SQL or NoSQL commands and convert into a format that front-end applications (client browser) can understand — such as JSON. In addition, the application server can use various security protocols — such as HTTPS encryption and token authorization — to ensure that communication between the database and the client application is safe and secure. One main advantage of using such an architecture is that you can deploy applications that target different platforms — desktop, mobile, web, and so on — using the same application server. It’s also very easy to scale your application horizontally in order to serve more users efficiently with fast response times.
We’re going to build a simple API server and demonstrate the various features that Feathers provides.
Prerequisites
Before you begin following this tutorial, you’ll need to have a good foundation in the following topics:
Feathers is built on top of Express, a minimalist web framework for Node.js. If you’ve completed the tutorials demonstrated in the links, you’ll realize that it's quite tiring building RESTful APIs using just Express. With Feathers, most of the repetitive work is already done for you. You only need to focus on configuring and customizing code. Let's dive into the code and learn how this web framework works.
Project Creation
To get started with Feathers, you’ll need to install its command line application globally:
npm install -g @feathersjs/cli
Next, create a new API project using the commands below:
mkdir contacts-api
cd contacts-api
feathers generate app
Below are the options I chose. Feel free to choose any testing framework. Unfortunately, testing is beyond the focus of this article, so it won't be covered here. Personally, I like simplicity, and that’s why I went with Jest.
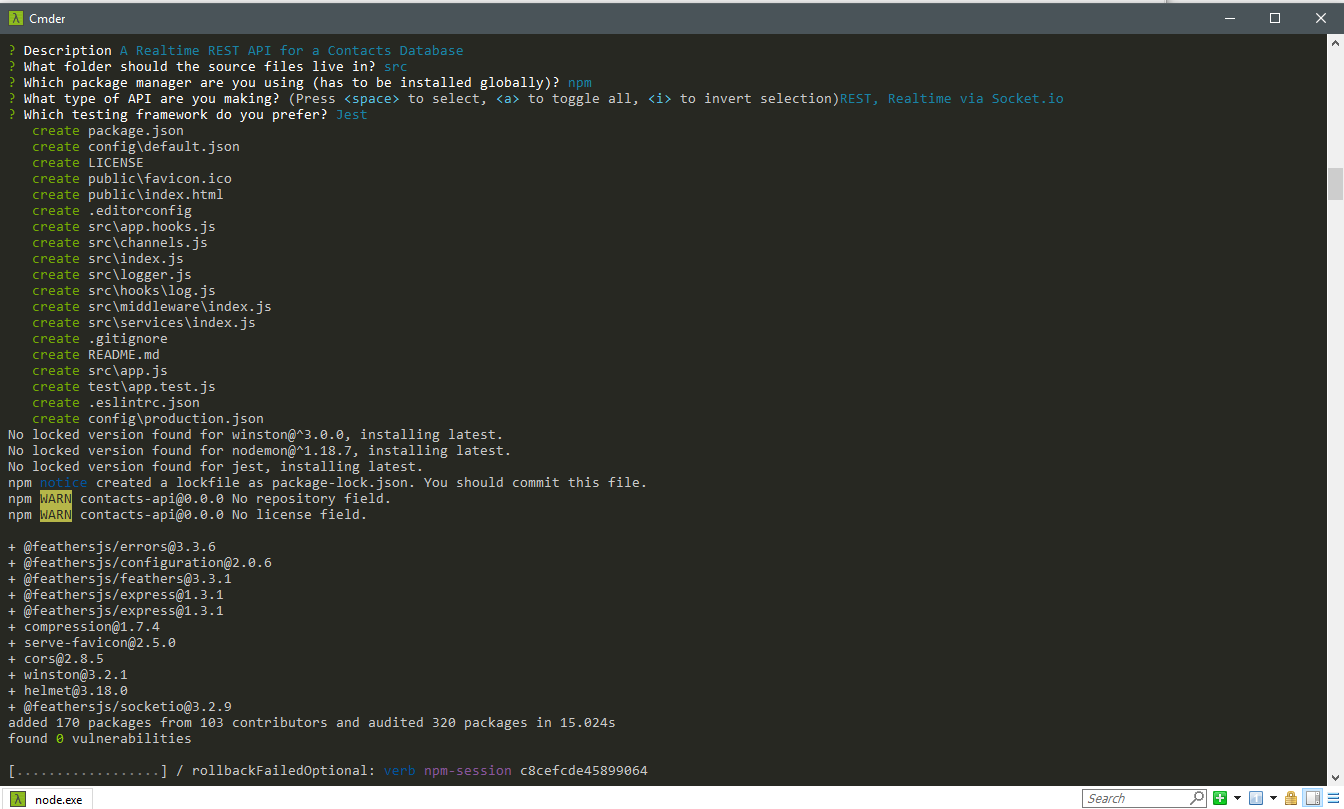
Once the installation is complete, you can open you favorite code editor to look at the project files.
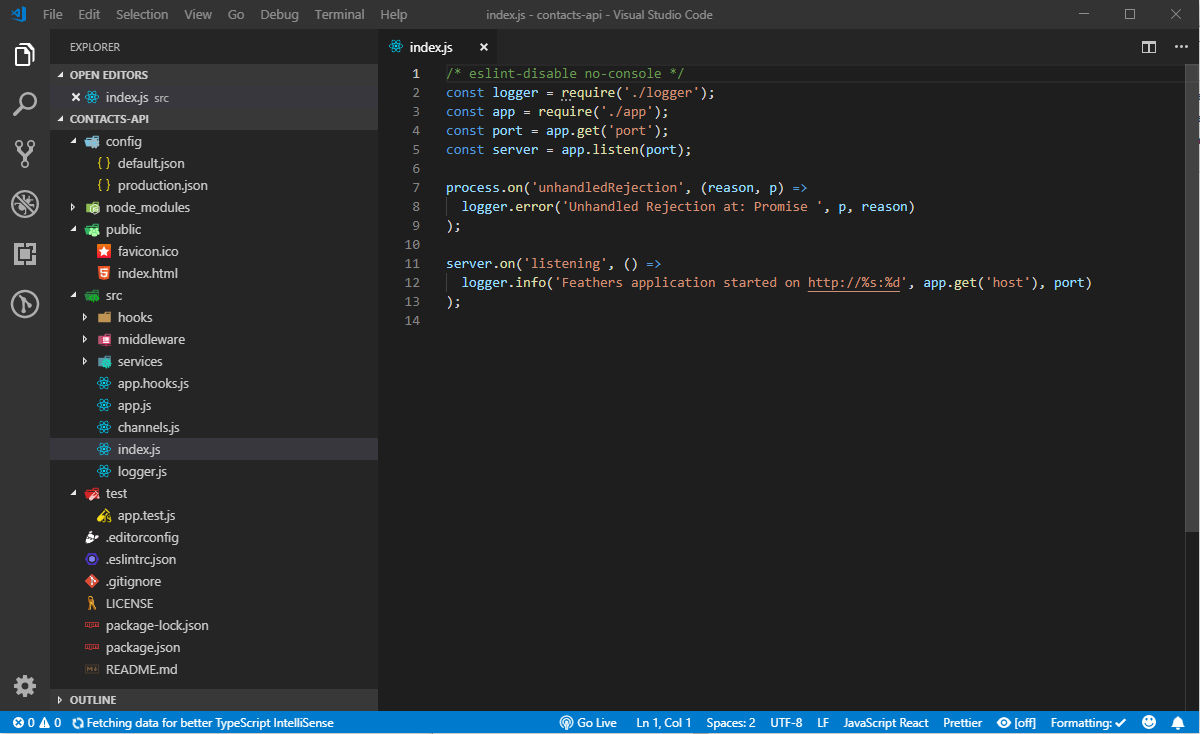
If you’ve completed the Express tutorials I listed in the prerequisites section, you shouldn't be intimidated by the generated code. Here's a brief summary that describes the folders and files.
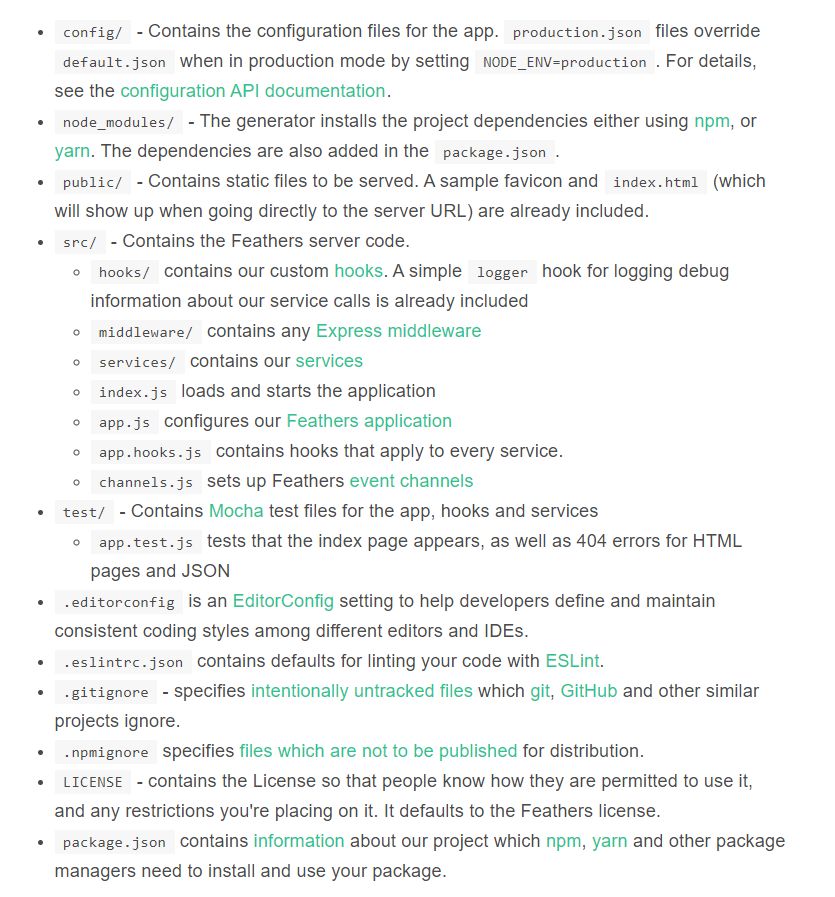
Don't be too concerned with what each file does right now. You’ll come to understand how they work in the course in this tutorial. For now, let's confirm that the tests are working.
Linting
To ensure our project is compliant with the defined ESLint rules, just run the command npm test. If you’re on a Unix or Linux platform, this should run fine. If you’re on Windows, there are few things you need to adjust for the tests to run successfully.
First, go to package.json and look at the scripts section. Change the test line to this:
"scripts": {
  "test": "npm run eslint && SET NODE_ENV= npm run jest",
},
Next, if you’ve installed Prettier in Visual Studio Code, you'll need to change the single quote setting to true in the Workspace settings tab:
{
  "prettier.singleQuote": true
}
Finally, make sure that, when you create or edit any file, the line ending is LF. If you’re using Visual Studio Code or a similar editor, you can check the current line ending style at the status bar. If it says CRLF, change to LF. Making those changes will help you pass the lint tests. Unfortunately, to make the tests pass will require a bit more work, which won't be covered here.
Let's look at how we can generate a CRUD RESTful interface.
Generate Service
Building a Restful CRUD API interface in Express requires a bit of work. In Feathers, all you have to do is execute a single command, answer a few questions and have the code generated for you:
$ feathers generate service
? What kind of service is it? NeDB
? What is the name of the service? contacts
? Which path should the service be registered on? /contacts
? What is the database connection string? nedb://../data
    force config\default.json
   create src\services\contacts\contacts.service.js
    force src\services\index.js
   create src\models\contacts.model.js
   create src\services\contacts\contacts.hooks.js
   create test\services\contacts.test.js
We’ll be using NeDB database for this tutorial. Feathers does support both SQL databases such as MySQL and NoSQL databases such as MongoDB. However, installing a database system — whether on your machine or on a cloud server — requires a certain amount of time configuring it. NeDB, on the other hand, is an in-memory database that’s 100% JavaScript and supports a subset of MongoDB API. There’s no configuration needed; you just install it. It's a great database for prototyping and testing new applications. This is what we’ll use in this tutorial.
Let's briefly look at some of the files that have been generated using this command:
-
services/contacts/contact.service.js. This is a Feathers service that provides the CRUD API endpoints for/contacts. Pretty small, isn't it? This is because Feathers does the heavy lifting for us. It saves us from writing boilerplate CRUD code. -
services/contacts/contact.hooks.js. This is where we customize how the CRUD logic behaves. We have thebeforesection, where we can check or change data before Feathers reads or writes to the database. We also have anaftersection, where we can check or change the results from the database before it’s sent to the client application. We can do things like restricting access, data validation, performing join operations and calculating values for additional fields or columns. -
models/contacts.model.js. This where we define a model and attach it to a database table. This is also where we define a schema which can be used to validate fields when a new record is inserted or updated. Unfortunately, NeDB doesn’t support schemas. However, I've provided an example of a model that’s connected to MongoDB, which supports the schema feature via themongooseadapter:
"use strict";

const mongoose = require("mongoose");
const Schema = mongoose.Schema;
require("mongoose-type-email");

const contactsSchema = new Schema({
  name: {
    first: { type: String, required: [true, "First Name is required"] },
    last: { type: String, required: false }
  },
  email: {
    type: mongoose.SchemaTypes.Email,
    required: [true, "Email is required"]
  },
  phone: {
    type: String,
    required: [true, "Phone is required"],
    validate: {
      validator: function(v) {
        return /^\+(?:[0-9] ?){6,14}[0-9]$/.test(v);
      },
      message: "{VALUE} is not a valid international phone number!"
    }
  },
  createdAt: { type: Date, default: Date.now },
  updatedAt: { type: Date, default: Date.now }
});

const contactsModel = mongoose.model("contacts", contactsSchema);

module.exports = contactsModel;
Despite the limitations of using NeDB, it’s still a great database for prototyping. Most NoSQL databases will allow you to submit data using any structure without having to define a schema first. It’s wiser to implement a schema once the project requirements have been realized. With a schema in place, Feathers will perform field validation for you using the rules you’ve defined. You'll need a production-ready database such as MongoDB to be able to define a schema. Do note the configuration for the development database is defined at config/default.json:
"nedb": "../data"
This is where database credentials are provided. We also have another config file called config/production.json. This is the production database configuration that’s used when you deploy your Feathers app. It's important to use a separate database during development. Otherwise, you run the risk of deleting or corrupting business operational data on the production database.
Now that we have our CRUD service for contacts set up, it's time to take it for a spin. You can start the Feather server using the command npm start. Do note that this server doesn’t support hot reloading. So you'll need to restart it every time you make a change to the code. In order to interact with our Feathers app, we’ll need an API browser tool such as Postman or Insomnia. I'll be using Insomnia in this tutorial, but you can follow along easily with Postman or any other tool.
Create a new GET request (press Ctrl + N) and give it the title “List Contacts”. In the URL section, enter http://localhost:3030/contacts. When you hit the Send button, you should have the following view:
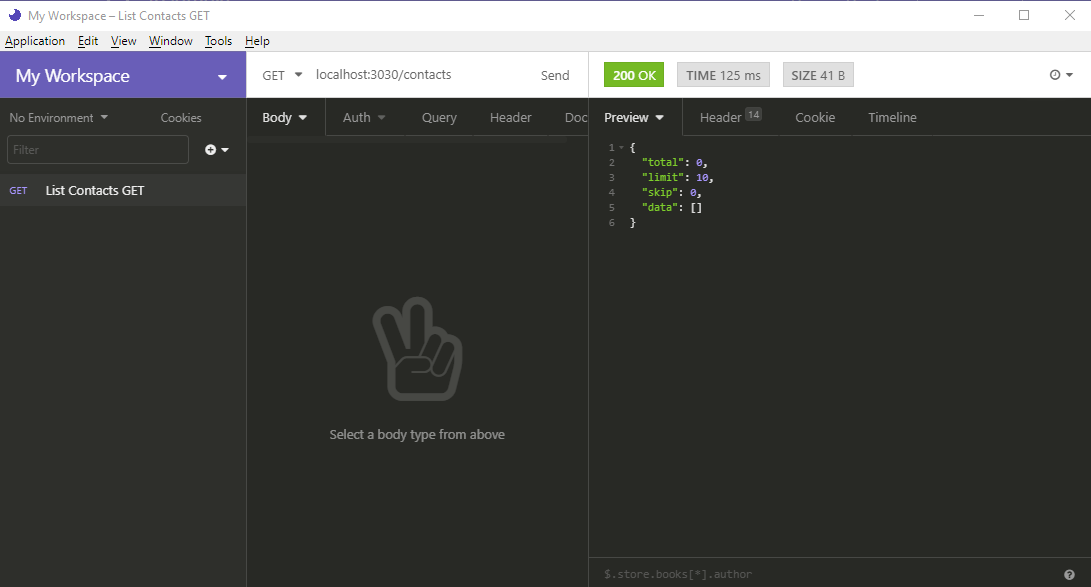
Nothing! Our database is currently empty, so we need to create some new contacts. Create a new request called Create Contact. Fill in the rest of the fields as shown below:
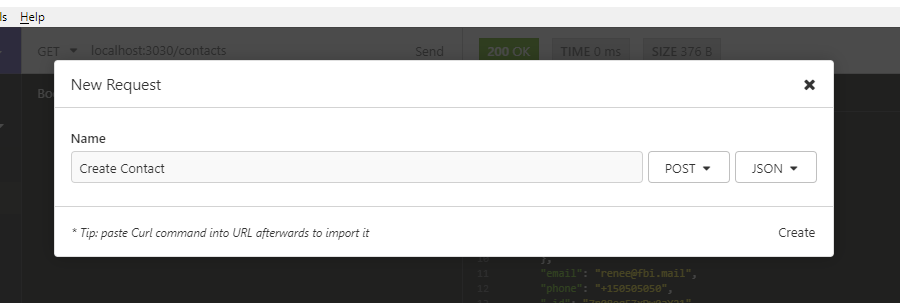
In case you forgot to change the METHOD to POST in the above form, you can do so later. Change the method to POST and change the Body tab to JSON. Copy the following data in the JSON tab:
{
  "name": {
    "first": "Jack",
    "last": "Bauer"
  },
  "email": "jack@ctu.mail",
  "phone": "+1234567"
}
When you hit the Send button, you should get the following response. Notice that an _id has been generated for your new contact.
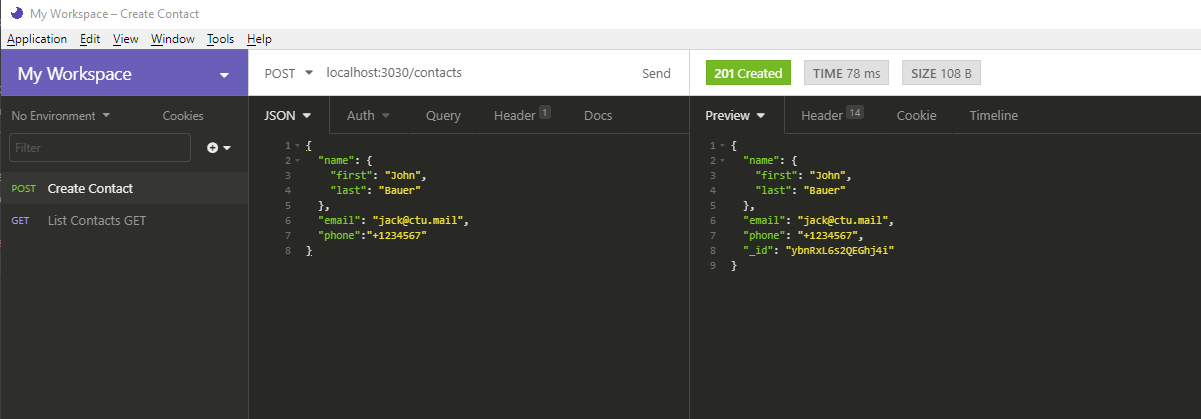
Go back to List Contacts and hit the Send button again. You should get the following result:
{
  "total": 1,
  "limit": 10,
  "skip": 0,
  "data": [
    {
      "name": {
        "first": "Jack",
        "last": "Bauer"
      },
      "email": "jack@ctu.mail",
      "phone": "+1234567",
      "_id": "ybnRxL6s2QEGhj4i"
    }
  ]
}
Go back to Create Contact and post a couple of new records:
{
  "name": {
    "first": "Chloe",
    "last": "O'Brian"
  },
  "email": "chloe@ctu.mail",
  "phone": "+1987654"
}
{
  "name": {
    "first": "Renee",
    "last": "Walker"
  },
  "email": "renee@fbi.mail",
  "phone": "+150505050"
}
Let's now perform an update. For this, we won't use the UPDATE HTTP method. This method will completely overwrite a record. What we want to do is just overwrite a single field, not the the whole record. For that, we’ll use PATCH. Create a new request, Update Contact as illustrated below:

In the URL field, put http://localhost:3030/contacts/{_id}. Replace {_id} with the ID of the first record. Place the following data into the JSON tab:
{
  "email": "jack.bauer@gmail.com"
}
Hit the Send button. You should get the following result:

Notice how the the rest of the fields remain intact. Next, we’re going to delete a record. This one is easy. Just create a new DELETE request and name it Delete Contact. In the URL field, use the format http://localhost:3030/contacts/{_id}. Just like before, replace {_id} with the ID of the record you want to delete. Hitting Send will delete that record for you. You can confirm by running the List Contact request again.
We've just verified that all CRUD operations are running okay. In the next section, we’ll learn how to set up authentication.
The post A Beginner’s Guide to Feathers.js appeared first on SitePoint.
No comments:
Post a Comment