Malware showcase is a Github repository that contains examples of malware usage and behavior, this repo should be used only
A Malware Showcase | Understanding Malware With Python on Latest Hacking News.
Malware showcase is a Github repository that contains examples of malware usage and behavior, this repo should be used only
A Malware Showcase | Understanding Malware With Python on Latest Hacking News.

In this article, you’ll learn how you can set up and run a local Linux shell interface in Windows without using a virtual machine. This not like using terminals such as Git Bash or cmder that have a subset of UNIX tools added to $PATH. This is actually like running a full Linux kernel on Windows that can execute native Linux applications. That's pretty awesome, isn't it?
If you’re an experienced developer, you already know that Linux is the best platform on which to build and run server-based solutions using open-source technologies. While it’s possible to run the same on Windows, the experience is not as great. The majority of cloud hosting companies offer Linux to clients to run their server solutions in a stable environment. To ensure software works flawlessly on the server machine just like on the local development machine, you need to run identical platforms. Otherwise, you may run into configuration issues.
When working with open-source technologies to build a project, you may encounter a dependency that runs great on Linux but isn’t fully supported on Windows. As a result, Windows will be required to perform one of the following tasks in order to contribute to the project:
All the above solutions require several minutes from launch to have a full Linux interface running. With the new Windows Subsystem for Linux version 2 (WSL2), it takes a second or less to access the full Linux shell. This means you can now work on Linux-based projects inside Windows with speed. Let's look into how we can set up one in a local machine.
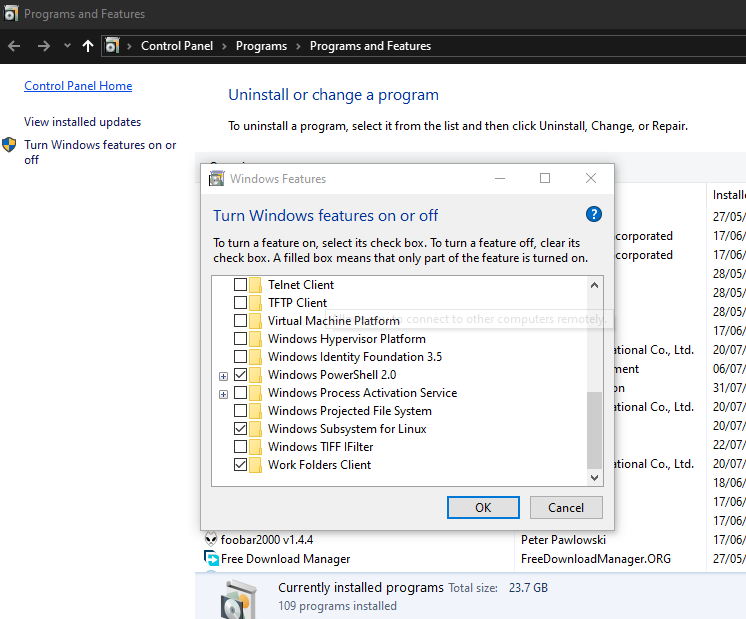
First, you'll need to be running the latest version of Windows. In my case, it's build 1903. Once you've confirmed this, you'll need to activate the Windows Subsystem for Linux feature. Simply go to Control-Panel -> Programs -> Turn Windows feature on or off. Look for "Windows Subsystem for Linux" and mark the checkbox. Give Windows a minute or two to activate the feature. Once it's done, click the restart machine button that appears next.
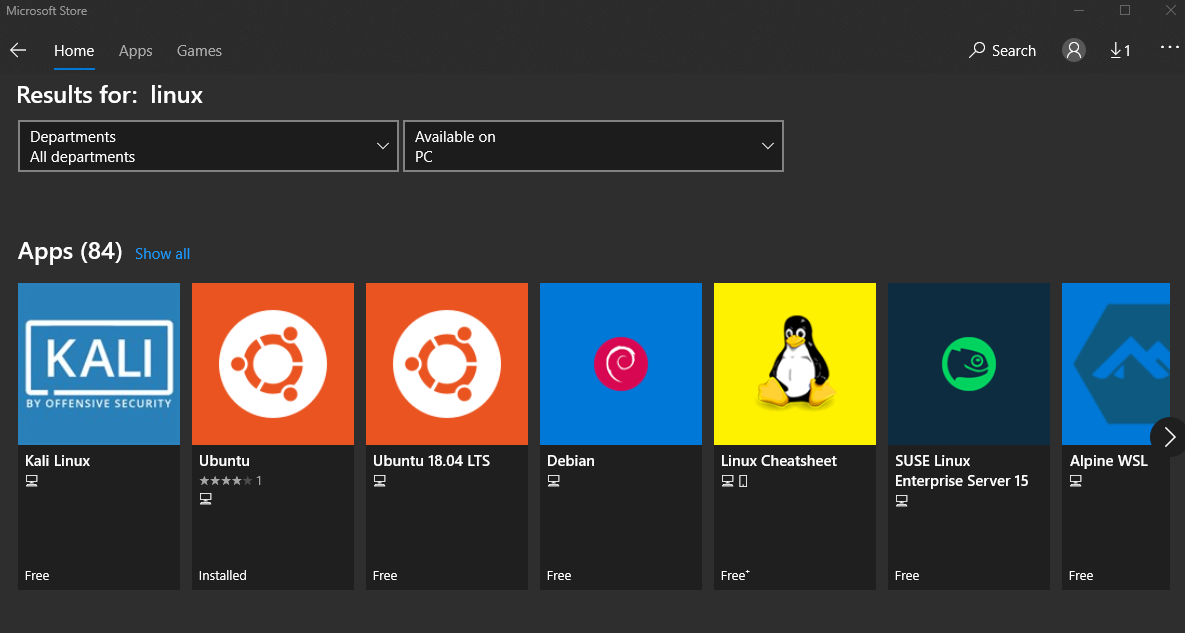
Next, go to the Windows Store and install Ubuntu. The first Ubuntu option will install the latest versions. Other Ubuntu options allow you to install an older supported version.
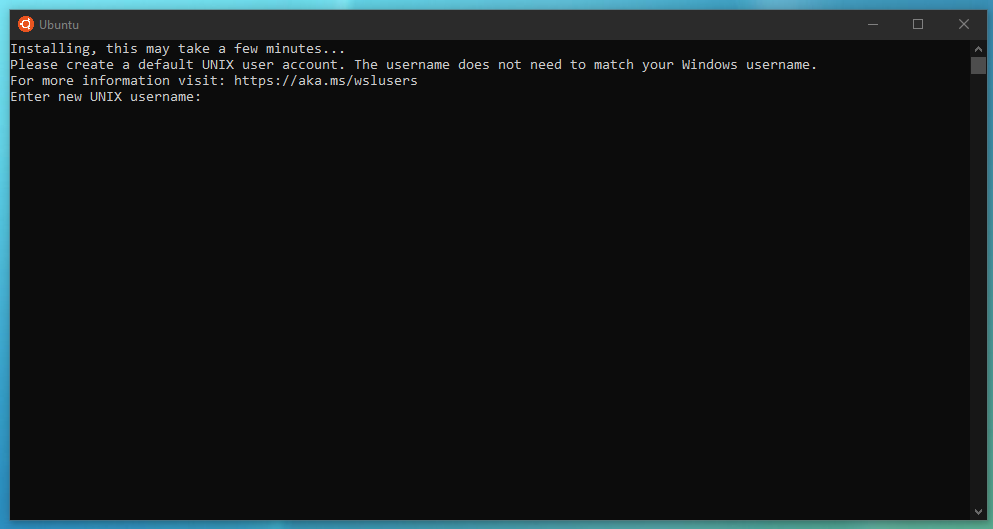
Once the installation is complete, you'll need to launch it from the menu. Since this is the first time, you’ll need to wait for the Ubuntu image to be downloaded and installed on your machine. This is a one-time step. The next time you launch, you’ll access the Linux Shell right away.
Once the image installation is complete, you’ll be prompted to create a new root user account inside this shell:
After you’ve created your credentials, feel free to type any Linux command to confirm you’re truly accessing a native Linux shell:
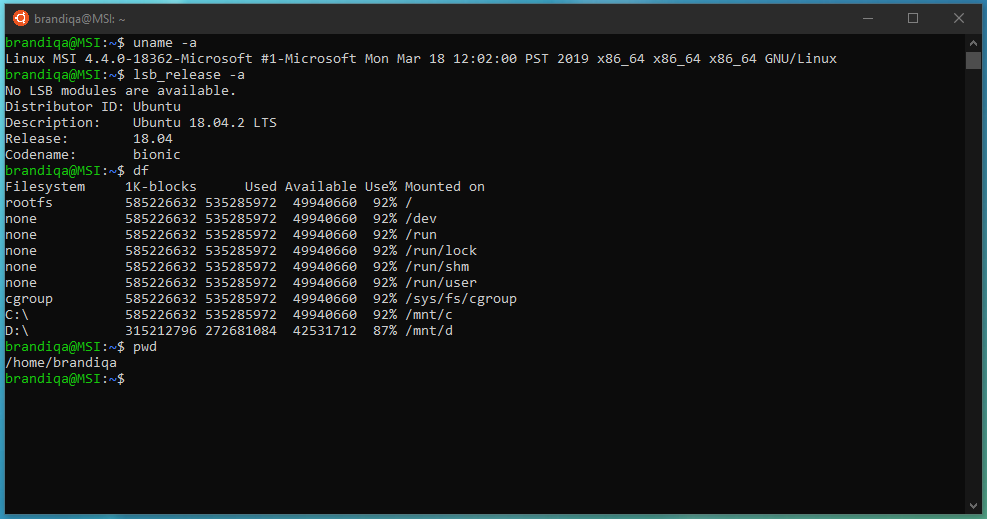
You’ll be pleased to note that git, python3, ssh, vim, nano, curl, wget and many other popular tools are available out of the box. In a later section, we'll use sudo apt-get command to install more frameworks. First, let's look at several ways we can access this new Linux shell terminal interface. It's probably a good idea to upgrade currently installed packages:
$ sudo apt-get update && sudo ap-get upgrade
The are several interesting ways of accessing the Linux shell interface.
Go to Windows Menu Start > type "Ubuntu". You can pin it to Start for quicker access
Open Command Prompt or Windows PowerShell and execute the command bash
In Windows explorer, SHIFT + right-mouse click a folder to open a special context menu. Click Open Linux shell here.
In Windows explorer, navigate to any folder you desire, then in the address bar type wsl, then press enter.
In Visual Studio Code, change the default terminal to wsl.
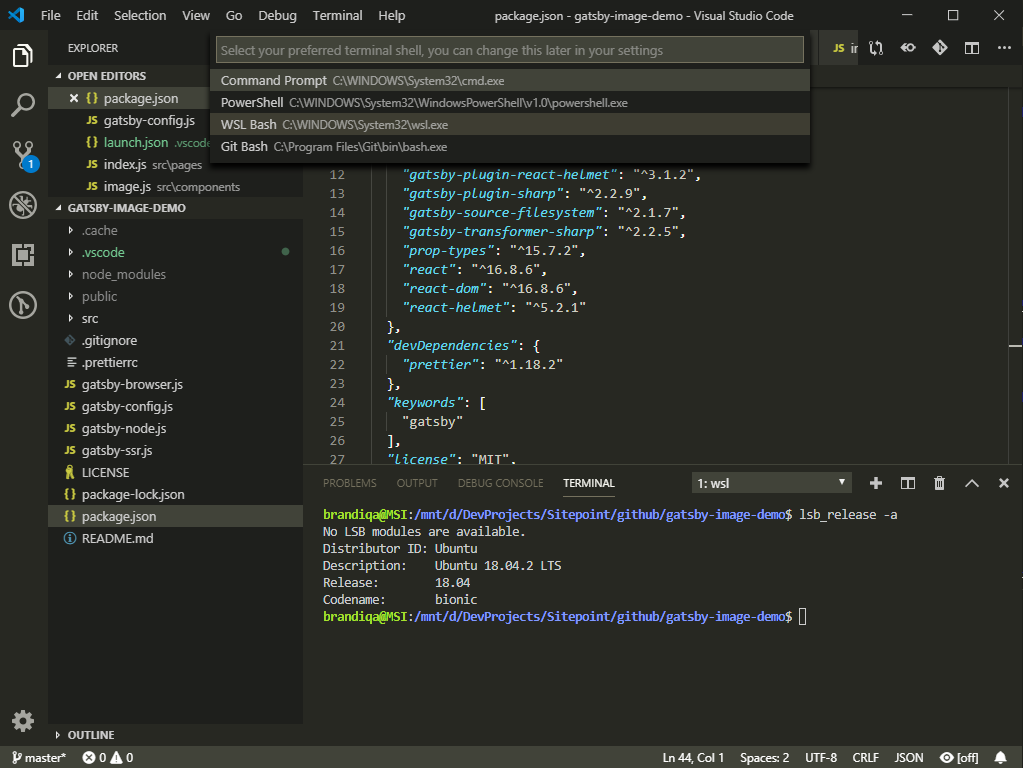
If you come across new ways, please let me know. Let's set up Node.js in the following section.
The post How to Use Windows Subsystem for Linux 2 and Windows Terminal appeared first on SitePoint.

This sponsored article was created by our content partner, BAW Media. Thank you for supporting the partners who make SitePoint possible.
As you've learned through experience, there's much involved in trying to find the right developers' tools or services for the task at hand.
It's a challenge. More and more software products and services are appearing on the market. But, every year it doesn't get any easier. This can be especially true in some cases. One case is where app developers have been trying to bridge the gap between software development and operations.
As you will see, open-source solutions go a long way toward resolving some of these problems. There are services that developers can use and that way can save them both time and money.
That's the case with the 6 products and services described below.
The post These Are the Best Developer Tools & Services appeared first on SitePoint.
Enterprises face the tough challenge of ensuring the security of their IT infrastructure. Data breach attempts have now become commonplace
3 Ways Attack Simulations Can Protect Enterprises Against Advanced Persistent Threats on Latest Hacking News.
Apple released its iOS 12.4 in the previous month while fixing a Walkie-Talkie bug breaching user’s privacy. However, little did
Apple Inadvertently Reversed A Patch That Lead To iOS 12.4 Being Jailbroken on Latest Hacking News.
In this tutorial we will see python matrix multiplication using numpy (Numerical Python) library.
For using numpy you must install it first on your computer, you can use package manager like pip for installing numpy.
Numpy provide array data structure which is almost the same as python list but have faster access for reading and writing resulting in better performance. We will use numpy arrays to represent matrices.
To perform matrix multiplication of matrices a and b , the number of columns in a must be equal to the number of rows in b otherwise we cannot perform matrix multiplication.
We must check this condition otherwise we will face runtime error.
There is * operator for numpy arrays but that operator will not do matrix multiplication instead it will multiply the matrices element by element.
Here is an example with * operator:
# Import numpy
import numpy as np

def printMatrix(a):

    # Printing matrix
    for i in range(0,len(a)):
        for j in range(0,len(a[0])):
            print(a[i][j],end = " ")
        print()

def main():

    # Declaring our matrices using arrays in numpy
    a = np.array([[1,2,3],[3,4,5],[5,6,7]])
    b = np.array([[1,2,3]])

    print("Matrix a :")
    printMatrix(a)
    print()

    print("Matrix b : ")
    printMatrix(b)
    print()

    # Using * operator to multiply
    c = a*b

    # Printing Result
    print("Result of a*b : ")
    printMatrix(c)

main()
Output:
Matrix a :
1 2 3
3 4 5
5 6 7
Matrix b :
1 2 3
Result of a*b :
1 4 9
3 8 15
5 12 21
We can see in above program the matrices are multiplied element by element. So for doing a matrix multiplication we will be using the dot function in numpy.
We can either write
for matrix multiplication here is the code:
# Import numpy
import numpy as np

def printMatrix(a):

    # Printing matrix
    for i in range(0,len(a)):
        for j in range(0,len(a[0])):
            print(a[i][j],end = " ")
        print()


def main():

    # Taking rows and columns of a
    m = int(input("Enter rows in a : "))
    n = int(input("Enter columns in a : "))

    # Taking rows and columns of b
    p = int(input("Enter rows in b : "))
    q = int(input("Enter columns in b : "))

    # Checking necessary condition for matrix multiplication
    if n!= p:
        print("Number of columns in b must be equal to rows in b")
        exit()

    # Initializing a and b list
    a = [ [0 for i in range(0,n)] for j in range(0,m) ]
    b = [ [0 for i in range(0,q)] for j in range(0,p) ]

    # Taking input list a
    print("Enter matrix a : ")
    for i in range(0,m):
        for j in range(0,n):
            a[i][j] = int(input("Enter element a[" + str(i) + "][" + str(j) + "] : "))

    # Taking input list b
    print("Enter matrix b : ")
    for i in range(0,p):
        for j in range(0,q):
            b[i][j] = int(input("Enter element b[" + str(i) + "][" + str(j) + "] : "))


    # Converting python list in numpy array
    a = np.array(a)
    b = np.array(b)

    print("Matrix a :")
    printMatrix(a)
    print()

    print("Matrix b : ")
    printMatrix(b)
    print()

    # Using dot operator to multiply
    c = a.dot(b)

    # Printing Result
    print("Result of a*b : ")
    printMatrix(c)


main()
Output:
Enter rows in a : 2
Enter columns in a : 3
Enter rows in b : 3
Enter columns in b : 2
Enter matrix a :
Enter element a[0][0] : 2
Enter element a[0][1] : 3
Enter element a[0][2] : 4
Enter element a[1][0] : 1
Enter element a[1][1] : 2
Enter element a[1][2] : 3
Enter matrix b :
Enter element b[0][0] : 4
Enter element b[0][1] : 5
Enter element b[1][0] : 1
Enter element b[1][1] : 6
Enter element b[2][0] : 9
Enter element b[2][1] : 7
Matrix a :
2 3 4
1 2 3
Matrix b :
4 5
1 6
9 7
Result of a*b :
47 56
33 38
Here the output is different because of the dot operator. Alternatively we can use the numpy matrices method to first convert the arrays into matrices and then use * operator to do matrix multiplication as below:
# Using * operator to multiply
c = np.matrix(a)*np.matrix(b)
Comment below if you have any queries related to python numpy matrix multiplication.
The post Python Numpy Matrix Multiplication appeared first on The Crazy Programmer.
ESET analysis breaks down the first known spyware that is built on the AhMyth open-source espionage tool and has appeared on Google Play – twice
The post First‑of‑its‑kind spyware sneaks into Google Play appeared first on WeLiveSecurity

