In this article, I'll walk you through building a full-stack, real-time Harry Potter house voting web application.
Real-time apps usually use WebSockets, a relatively new type of transfer protocol, as opposed to HTTP, which is a single-way communication that happens only when the user requests it. WebSockets allow for persistent communication between the server and the user, and all those users connected with the application, as long as the connection is kept open.
A real-time web application is one where information is transmitted (almost) instantaneously between users and the server (and, by extension, between users and other users). This is in contrast with traditional web apps where the client has to ask for information from the server. — Quora
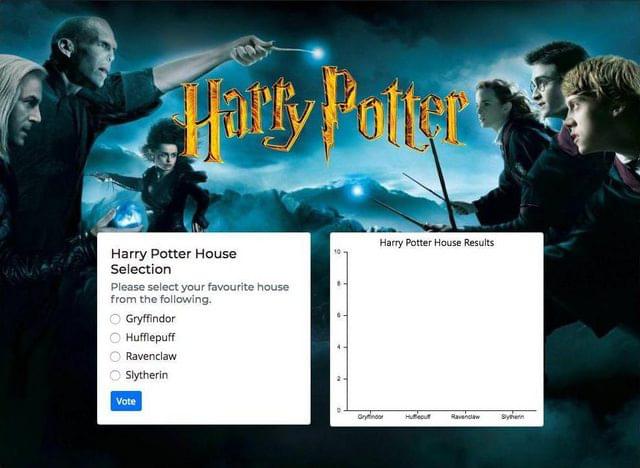
Our Harry Potter voting web app will show options (all the four houses) and a chart on the right side that updates itself when a connected user votes.
To give you a brief idea of look and feel, the final application is going to look like this:

Here's a small preview of how the real-time application works:
To make our application real-time, we’re going to use Pusher and WebSockets. Pusher sits as a real-time layer between your servers and your clients. It maintains persistent connections to the clients — over a WebSocket if possible, and falling back to HTTP-based connectivity — so that, as soon as your servers have new data to push to the clients, they can do so instantly via Pusher.
Building our Application
Let’s create our fresh application using the command npm init. You’ll be interactively asked a few questions on the details of your application. Here's what I had:
praveen@praveen.science ➜ Harry-Potter-Pusher $ npm init
{
  "name": "harry-potter-pusher",
  "version": "1.0.0",
  "description": "A real-time voting application using Harry Potter's house selection for my article for Pusher.",
  "main": "index.js",
  "scripts": {
    "test": "echo \"Error: no test specified\" && exit 1"
  },
  "repository": {
    "type": "git",
    "url": "git+https://github.com/praveenscience/Harry-Potter-Pusher.git"
  },
  "keywords": [
    "Harry_Potter",
    "Pusher",
    "Voting",
    "Real_Time",
    "Web_Application"
  ],
  "author": "Praveen Kumar Purushothaman",
  "license": "ISC",
  "bugs": {
    "url": "https://github.com/praveenscience/Harry-Potter-Pusher/issues"
  },
  "homepage": "https://github.com/praveenscience/Harry-Potter-Pusher#readme"
}

Is this OK? (yes)
So, I left most settings with default values. Now it's time to install dependencies.
Installing Dependencies
We need Express, body-parser, Cross Origin Resource Sharing (CORS), Mongoose and Pusher installed as dependencies. To install everything in a single command, use the following. You can also have a glance of what this command outputs.
praveen@praveen.science ➜ Harry-Potter-Pusher $ npm i express body-parser cors pusher mongoose
npm notice created a lockfile as package-lock.json. You should commit this file.
npm WARN ajv-keywords@3.2.0 requires a peer of ajv@^6.0.0 but none is installed. You must install peer dependencies yourself.

+ pusher@2.1.2
+ body-parser@1.18.3
+ mongoose@5.2.6
+ cors@2.8.4
+ express@4.16.3
added 264 packages in 40.000s
Requiring Our Modules
Since this is an Express application, we need to include express() as the first thing. While doing it, we also need some accompanying modules. So, initially, let’s start with this:
const express = require("express");
const path = require("path");
const bodyParser = require("body-parser");
const cors = require("cors");
Creating the Express App
Let’s start with building our Express application now. To start with, we need to get the returned object of the express() function assigned to a new variable app:
const app = express();
Serving Static Assets
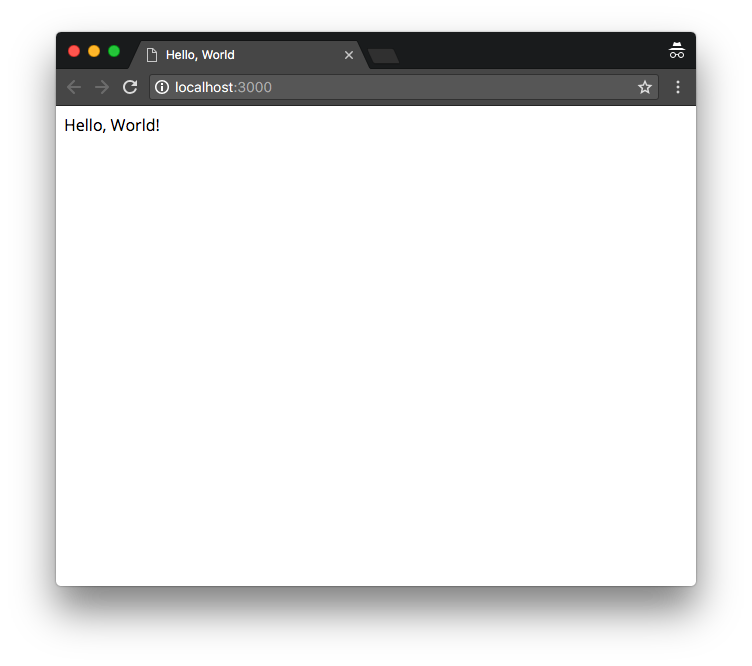
Adding the above line after the initial set of includes will initialize our app as an Express application. The next thing we need to do is to set up the static resources. Let’s create a new directory in our current project called public and let’s use Express's static middleware to serve the static files. Inside the directory, let’s create a simple index.html file that says “Hello, World”:
<!DOCTYPE html>
<html>
  <head>
    <meta charset="utf-8" />
    <meta name="viewport" content="width=device-width" />
    <title>Hello, World</title>
  </head>
  <body>
    Hello, World!
  </body>
</html>
To serve the static files, we have a built-in .use() function with express.static() in Express. The syntax is as follows:
app.use( express.static( path.join(__dirname, "public") ) );
We also need to use the body parser middleware for getting the HTTP POST content as JSON to access within the req.body. We'll also use urlencoded to get the middleware that only parses urlencoded bodies and only looks at requests where the Content-Type header matches the type option. This parser accepts only UTF-8 encoding of the body and supports automatic inflation of gzip and deflate encodings:
app.use( bodyParser.json() );
app.use( bodyParser.urlencoded( { extended: false } ) );
To allow cross-domain requests, we need to enable CORS. Let’s enable the CORS module by using the following code:
app.use( cors() );
Now all the initial configuration has been set. All we need to do now is to set a port and listen to the incoming connections on the specific port:
const port = 3000;
app.listen(port, () => {
  console.log(`Server started on port ${port}.`);
});
Make sure your final app.js looks like this:
const express = require("express");
const path = require("path");
const bodyParser = require("body-parser");
const cors = require("cors");

// Create an App.
const app = express();

// Serve the static files from public.
app.use( express.static( path.join(__dirname, "public") ) );

// Include the body-parser middleware.
app.use( bodyParser.json() );
app.use( bodyParser.urlencoded( { extended: false } ) );

// Enable CORS.
app.use( cors() );

// Set the port.
const port = 3000;
// Listen to incoming connections.
app.listen(port, () => {
  console.log(`Server started on port ${port}.`);
});
Run the command to start the server:
$ npm run dev
Open your http://localhost:3000/ on a new tab and see the magic. You should be seeing a new page with “Hello, World”.

The post Build a Real-time Voting App with Pusher, Node and Bootstrap appeared first on SitePoint.
No comments:
Post a Comment